
Table of Contents:
- Portrait Drawing: Theory and Practice
- Step-by-Step Drawing Tutorial
- Additional Advice for Your Portrait Drawing
Portrait Drawing: Theory and Practice
Learning how to draw people is one of the most challenging, yet interesting things in the world of art. A common mistake novice artists make is creating a portrait without knowledge of the theory behind drawing realistic portraits. Knowing the proportions and anatomy of a human face, how perspective works and other nuances make the process of creating a portrait much easier.
This article was created to educate aspiring artists about the main steps of creating a self-portrait. We break down the creative process into easy-to-understand steps so that anyone can follow along. As you practice and keep observing the human form, you’ll find yourself improving and eventually you’ll become an expert!
You don’t need a model to start drawing portraits, you can simply start by drawing yourself. You can start by either taking a selfie or grabbing a mirror. Drawing from life is always a good idea so a mirror will give you a good representation of what you look like in the present moment. However if you think your drawing may take a bit long, a photo is a great choice.
Step-by-Step Drawing Tutorial
The first thing to understand is that, in general, all people are the same. Of course, we have differences, but for the most part, we all have the same parts. Almost everyone has eyes, ears, mouths and so on. Everyone’s facial features are placed in similar locations which we can determine by looking at proportions. The first thing we want to do is to create a general shape.
Note: The artwork must be created according to the system from general to specific. In the initial stages, you don’t want to get too invested in the details. Think in large shapes. Do not get hung up on how to draw an eye or nose. At this moment, we’re just determining where they should be located.
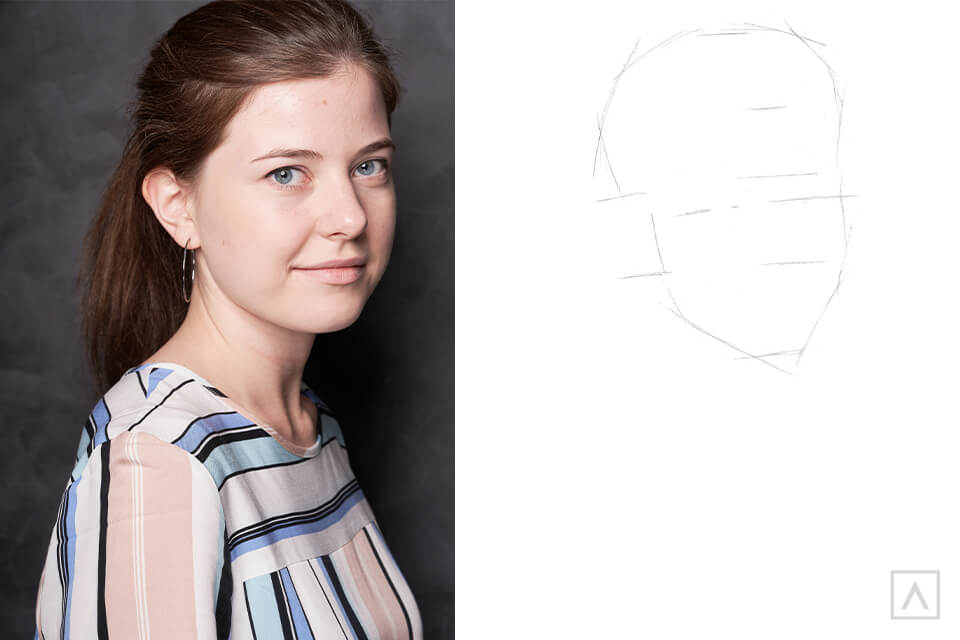
Step 1
Take a moment to observe your face in the mirror or take a close look at your photo. Use lines to outline the height and width of the head on the sheet. Note that the model we drew, had her head slightly tilted.

Step 2
Now let's outline the face. Let’s start by sketching the hairline. Next, divide the area from the hairline to the chin into 3 equal parts. The first part is from the beginning of hair growth to the eyebrows. The second part is from the eyebrows to the base of the nose. The third part is from the base of the nose to the chin. Generally, these three sections are the same for all people. Also, the distance between sections will be equal to the height of the ear, but we'll discuss that later.

Step 3
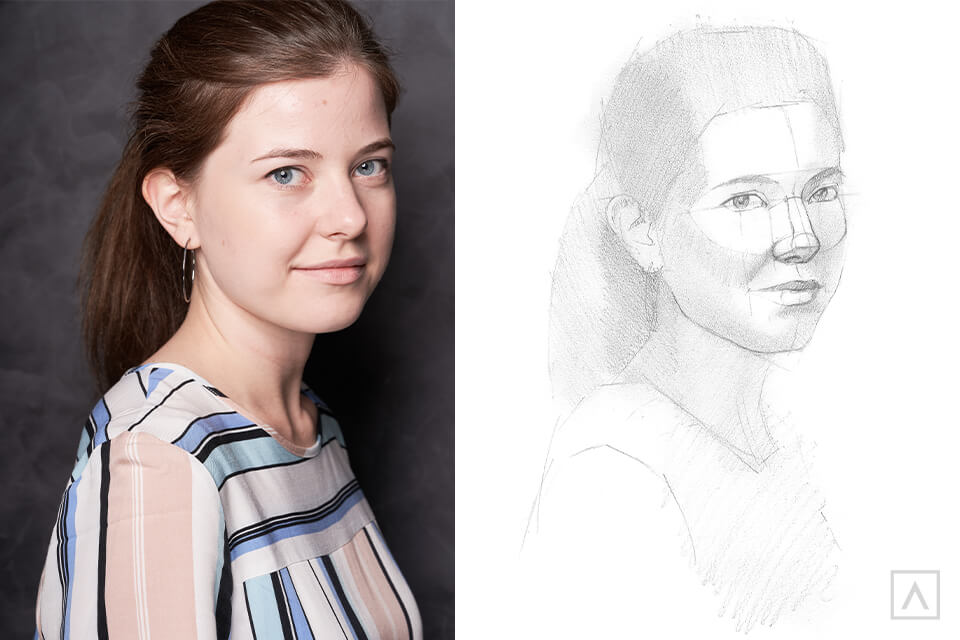
If the face (the area from the hairline to the chin) is divided into two parts, then we’ll understand where the eyes are located. In order to draw the ear, you need to keep in mind that it should be on the same level as the second section. At this step, sketch an oval for the head.
Note: In the initial stages, the lines don’t have to be extremely accurate. They are just guidelines.
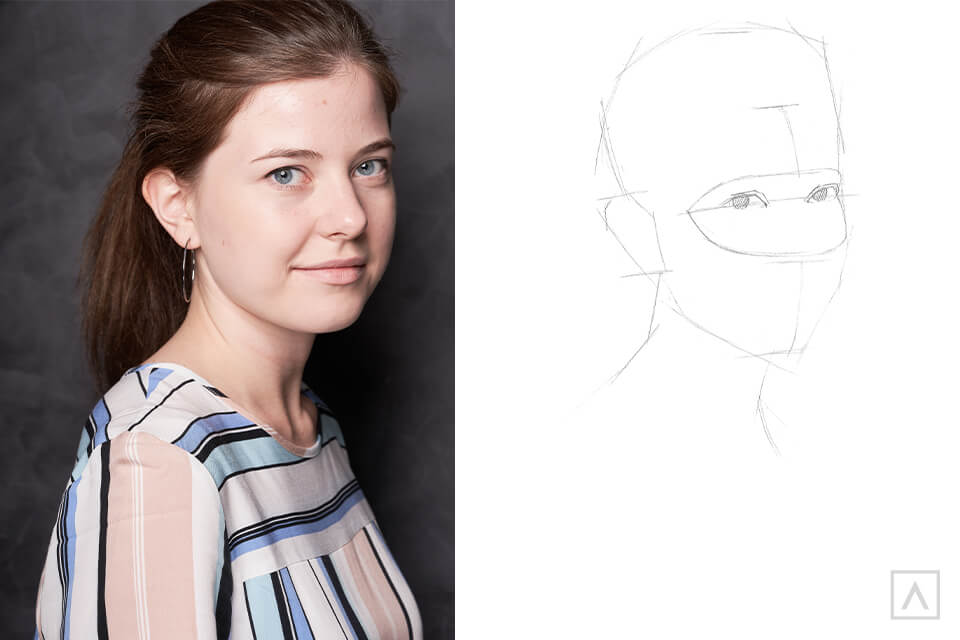
Step 4
Now, we're outlining the shape of the ear.
Sketch pupils on the line where the eyes should be. Make sure they are looking in the same direction. Add a line for the upper eyelid and give it a bit of thickness. The distance between the eyes is equal to the width of one eye.
After that, you need to draw the brow bone. This is also done to avoid making the face look flat. For the same reason, we’ll be sketching the cheekbones. Note how the face now looks turned.
You can also draw an axis of symmetry to help you.
Next, sketch your neck.
Step 5
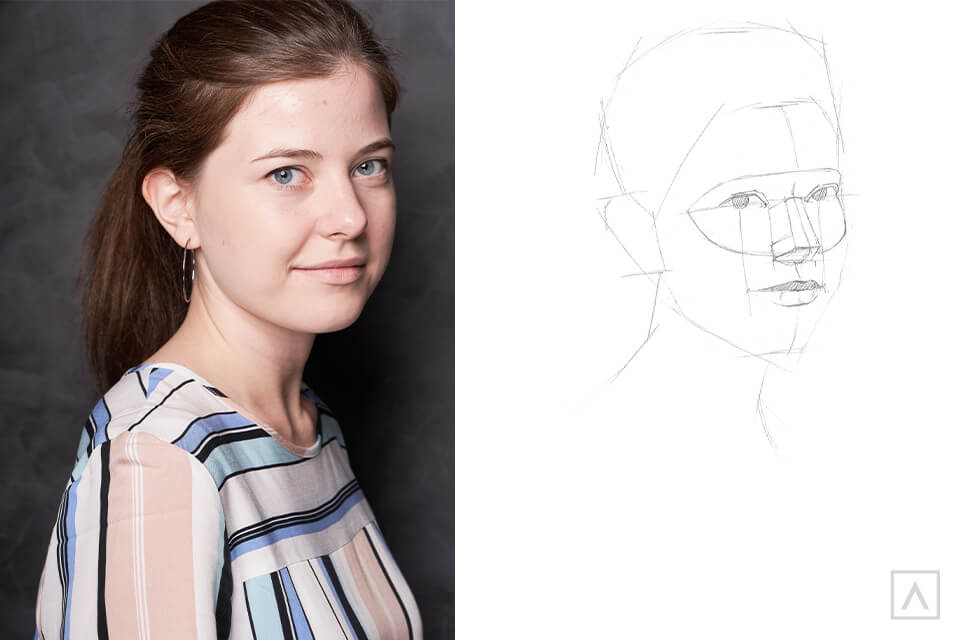
Let's start adding details to the parts of the face. Since all the parts of the head are interconnected, it's necessary to draw everything relative to each other. If you draw a vertical line from the inner corner of the eye to the bottom of the second section, then it will be equal to the width of the nose. Draw another vertical line from the middle of the eye to the line for the mouth to get the width of the mouth.
While we’re drawing the nose, don't forget about its volume. The nose has a top, side edges and a bottom edge. Don’t forget to sketch the bridge of the nose.
Divide the area from the base of the nose to the chin into two parts and place the lower lip exactly in the middle.
Also sketch your hairline on the side of your head.
Note: You may now have a lot of excess construction lines that can appear confusing. This is fine. Eventually you won't need the construction lines because your brain will already understand where everything should be.
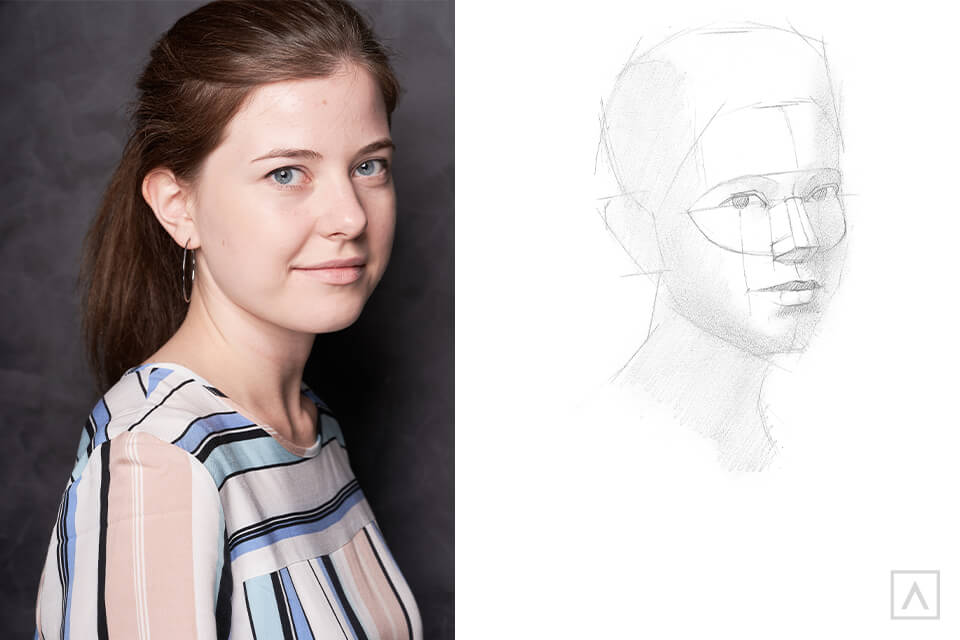
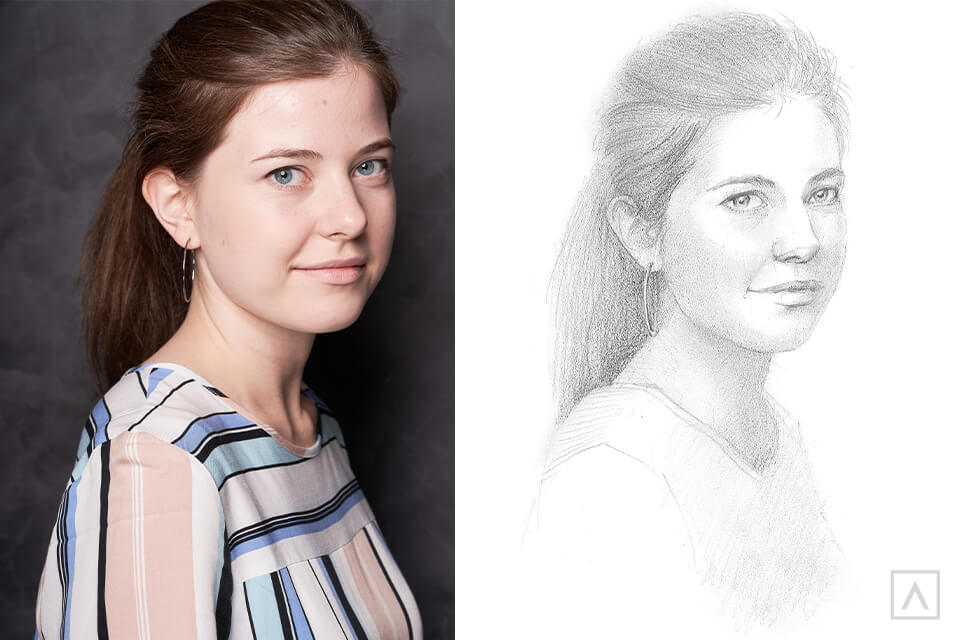
Step 6
Next, draw in the eyebrows. Look carefully at your facial structure. Our brain perceives tones better than lines. Add some shadows in the shaded areas to give your drawing dimension. Usually shadows will appear under the eyebrows and under the nose. The upper lip will also be mostly in shadow. In this case, the light source is on the right side, which means that the left side of the portrait is in the shadow. The neck is also in shadow. At this stage, it is important to create a tone that you can continue working with throughout the portrait.
Now that the sketch is ready, you can work with the individual characteristics of what makes you unique. To do this, you need to constantly compare your drawing to the photo or your face in the mirror and analyze.
Note: A good way of learning to analyze the characteristics that make everyone unique is by trying to describe your features to someone else. What makes your face different from others? Maybe bushy, straight eyebrows? Or maybe the eyebrows are thin and go in a semicircle? Do you have you lush lips? Maybe they are neat and thin? What kind of hair? What shape are the eyes? Create a verbal portrait in your head.
Smooth out the lines of the nose, ear and face shape. Analyze where you would place the lines on the face and draw attentively. Be careful with your shading, you want it to be detailed and interesting. In shady places, you can make the shadows richer by combining hatching with shading.
Note: If you want to soften the shading, the paper blenders from the Expert Drawing Pencil Set - 33 Pieces or our Drawing & Detailing Accessory Tools - 35 Piece Set are good for this.
Step 7
Finish off your portrait by adding more details like the hair, eyelashes and lips. Increase the contrast where needed.
Step 8
Your portrait is ready!
Additional Advice for Your Portrait Drawing
I hope you've learned a lot of interesting information from this self-portrait article. The general theory of drawing faces and portraits is very important, but without practice it is nearly impossible. The more portraits you draw, the easier and better they will be for you. You’ll want to have drawing supplies nearby so that you can easily create values, blending and more. Simply choose a model that inspires you to create a portrait or grab a mirror for a self-portrait and go for it!


2 comments
We’re so glad you think so! Happy creating!
Wow, so cool! I will definitely try it!!