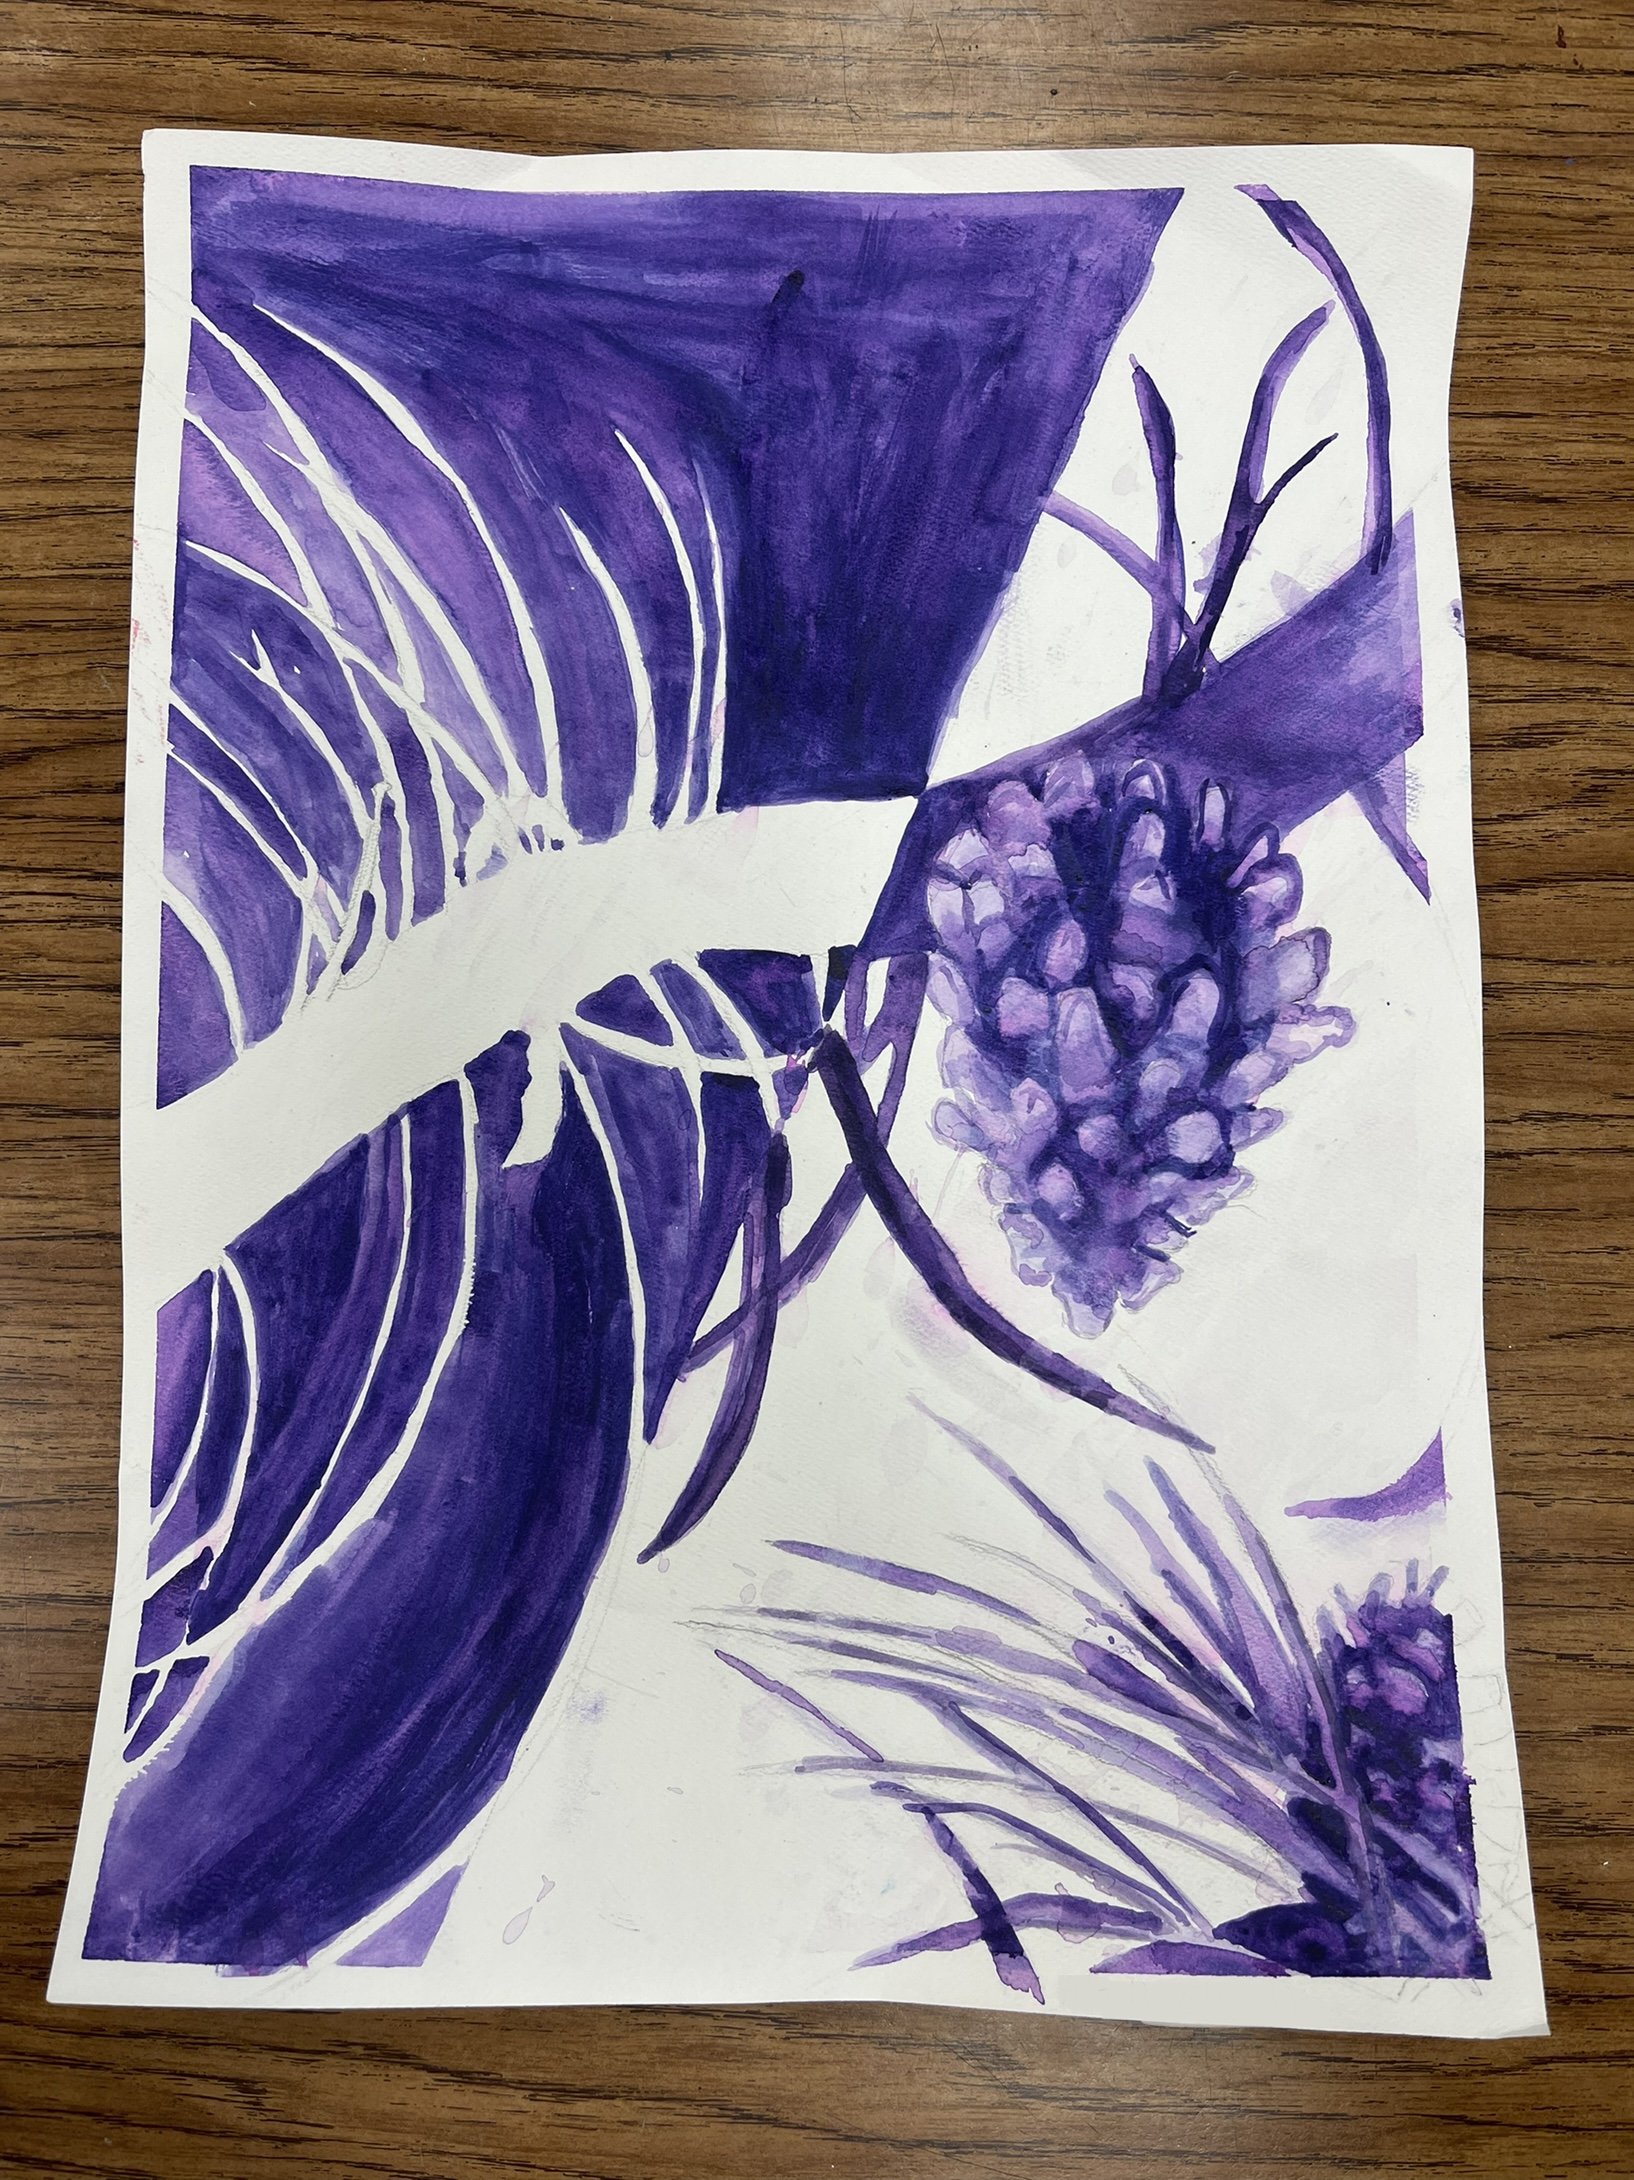
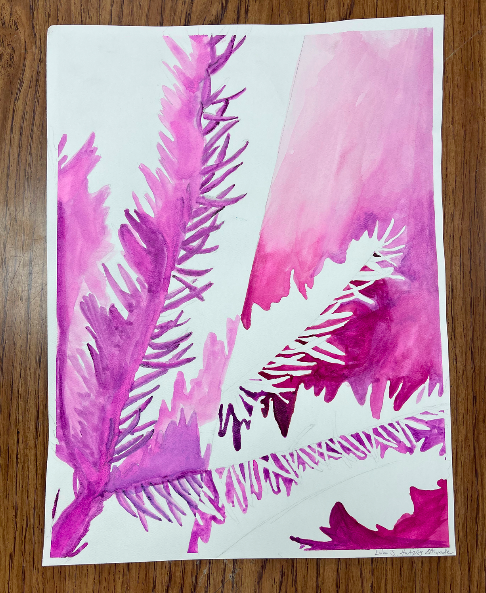
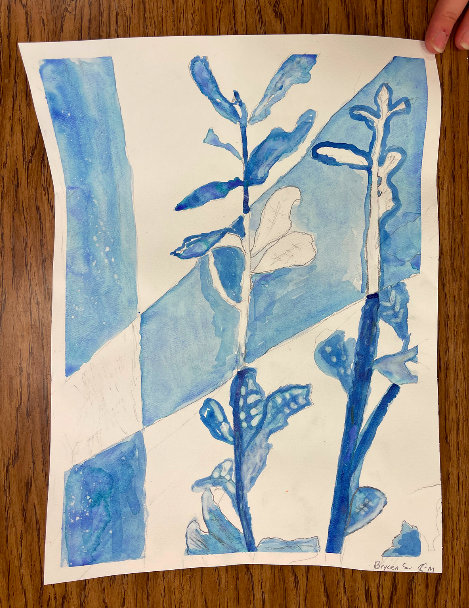
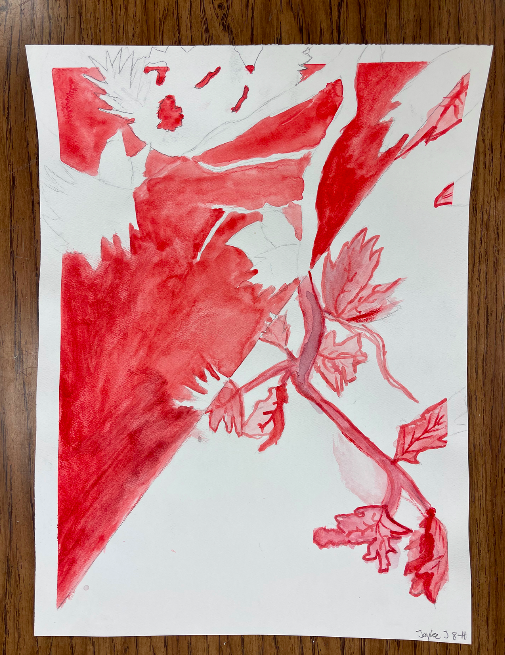
Positive/Negative Space Watercolor–8th Grade
I was so excited about this idea for a lesson that I failed to teach it at the correct time…for this project, I proudly and naively led my students outside to take pictures of what they wanted to paint. Too bad it was winter…I would definitely recommend teaching this project in early fall or late spring, and I will be doing so myself in the future!
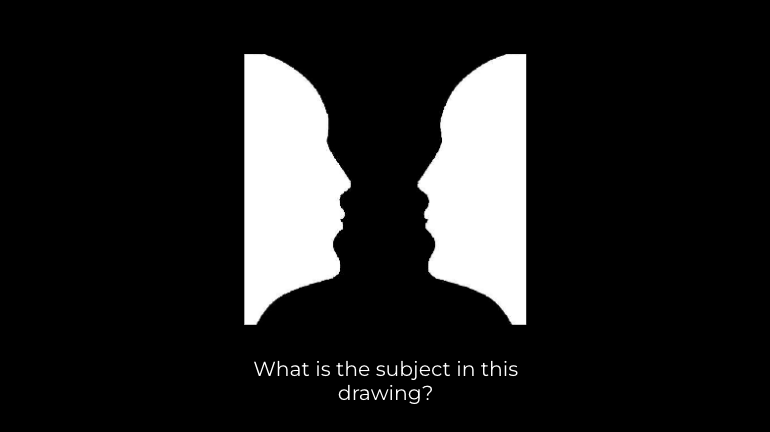
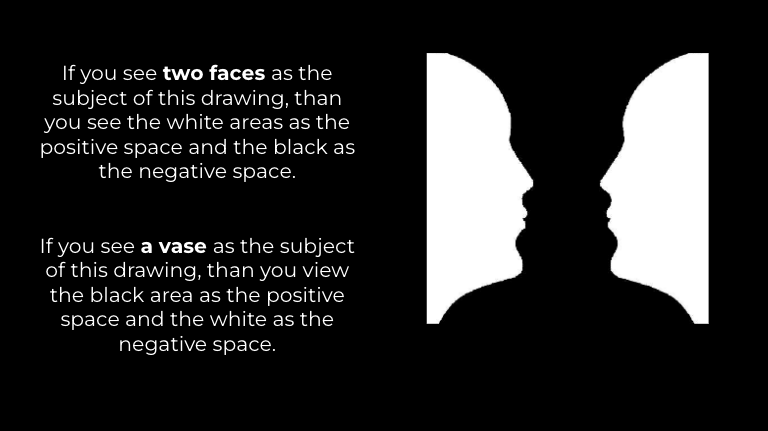
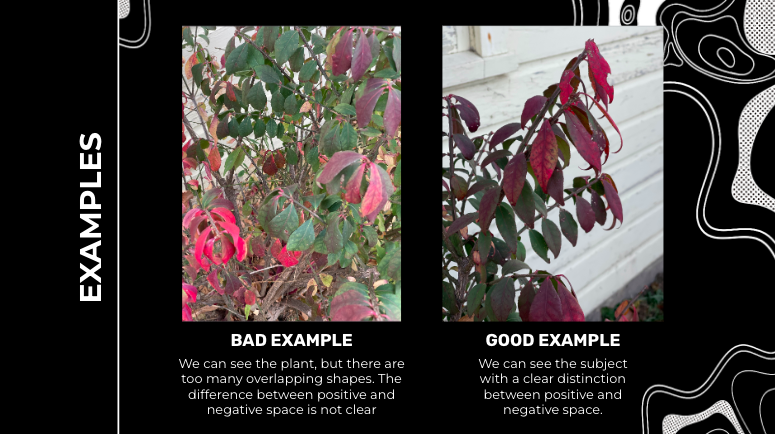
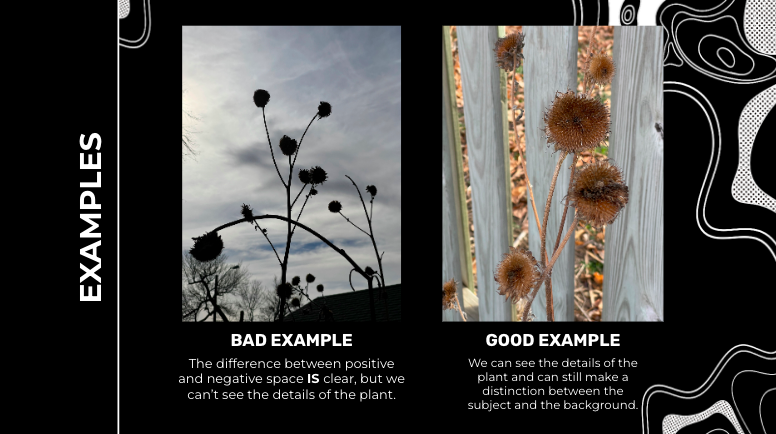
In my presentation (which you can find here), we define subject, positive space, and negative space, and we practice using these definitions on different artworks. Afterwards, I give them instructions on how to take a good reference picture for our project. When we go outside, most students will choose some sort of flower or plant for the subject of their painting (again, much easier to do when it isn’t frozen outside).
Once everyone is clear on my rules for reference pictures, we don our coats and bundle up to go outside. This is one of the very rare occasions I let my students use their phones for a project; a lot of teachers are opposed to this kind of approach, but I think it’s important to teach kids how to use their devices responsibly. If there is a student or two that doesn’t respect my rules for the phones, the device gets taken away and they have to use a prepared photo I took ahead of time. Works like a charm!
Finally, once reference photos are printed and papers are drawn on, we move onto painting! Splitting the paper in half, we paint the positive space on one side the the negative space on the other side. You can watch my instructions and demonstration in the video above!
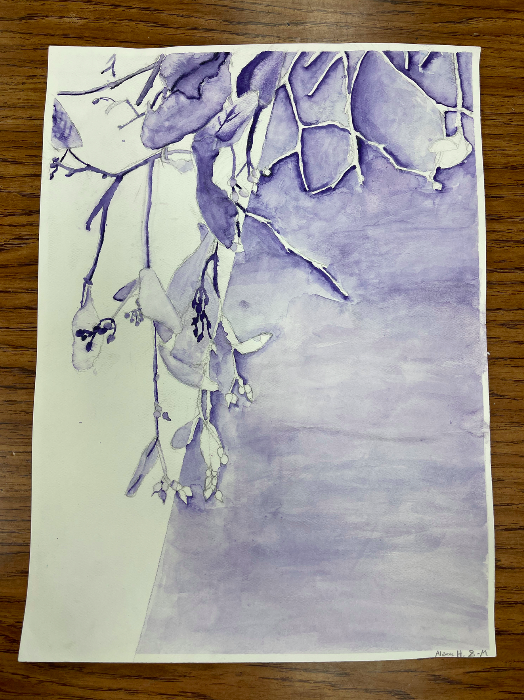
Below I have student examples for this project. Thank you for reading!